Kerala · Indian Cuisine
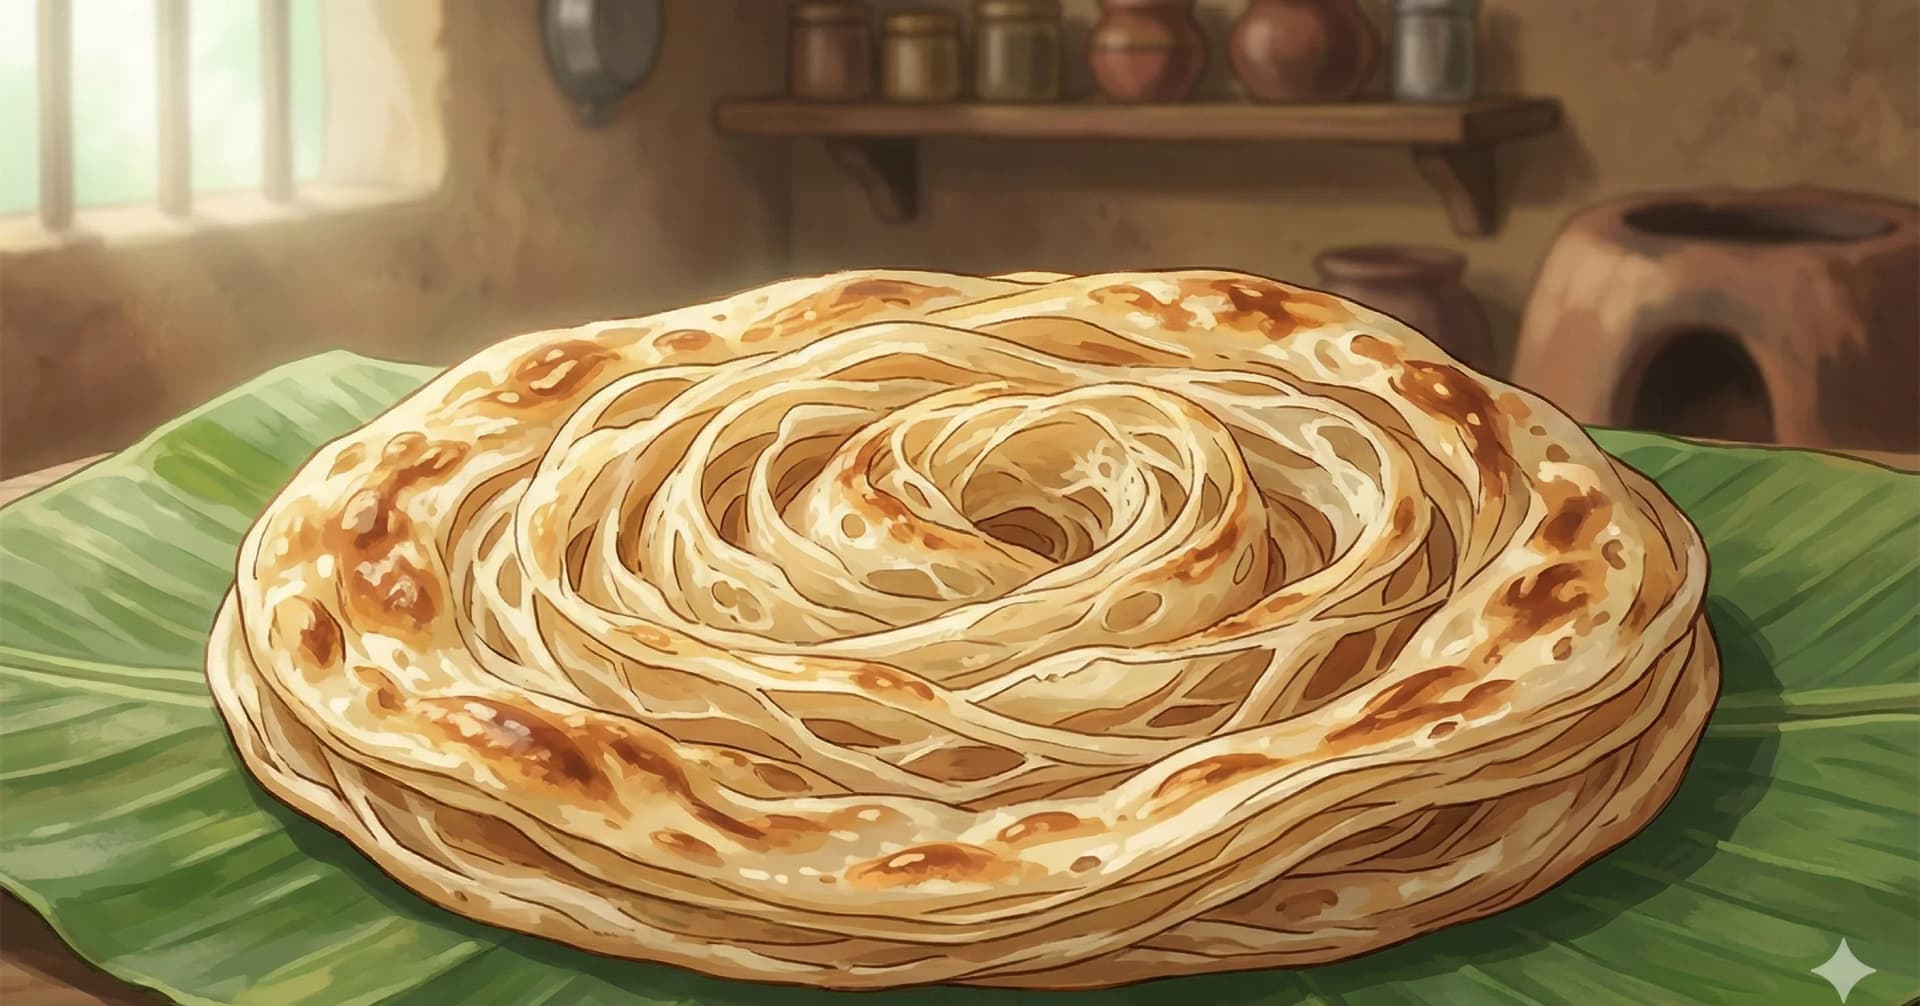
Malabar Paratha
North Kerala's flaky, coiled flatbread — thin oiled dough strips wound into layers, pressed open on the griddle with ghee
The Malabar coast of North Kerala has its own culinary identity, shaped by centuries of Arab trade, the Mappila Muslim community's distinct food traditions, and the particular geography of a coastline where rice, coconut, and seafood dominate but wheat flatbreads have always had their place at the table. The Malabar Paratha is the most celebrated of these: a bread that looks simple but requires patience, technique, and a particular understanding of gluten and time.
What separates the Malabar Paratha from a Kerala paratha made in the same city is, primarily, the technique of forming layers. After the dough is rolled very thin, it is not simply pleated and coiled. It is first pulled into a long strand, like a thick ribbon, before being wound into the roundel that will eventually become the paratha. This extra step adds more and finer layers. More oil between more sheets. More surface area to crisp.
The dough rests twice, possibly three times if you count the coil's final rest. Each rest matters. The first is for the bulk dough to relax fully. The second, once divided into balls coated in oil, is for individual relaxation. This is what makes rolling tissue-thin possible without tearing. The coil rests once more before pressing, allowing the wound layers to settle and adhere slightly without merging.
Cooking is slow, over low flame, with ghee rather than oil. The low heat allows the interior layers to cook through without the exterior burning, and the ghee adds the final character: a richness and a slight nutty fragrance that oil cannot provide.
The last step is the most important and the most satisfying: pressing the hot paratha from all sides between your palms. The layers separate, the surface shatters slightly, and the bread becomes itself.
At a Glance
Yield
15 parathas
Prep
40 minutes + 2–3 hours resting
Cook
45 minutes
Total
3.5–4 hours
Difficulty
Involved
Ingredients
Key Ingredient Benefits
Refined flour (maida): Essential to this bread. The high gluten content of maida is what allows the extreme extensibility required for this technique. Whole wheat flour would produce a denser, less layered result.
Ghee for cooking: The choice of ghee over oil is both flavor and technique. Ghee has a higher smoke point than butter and a distinctive richness that browns paratha surfaces beautifully. The milk solids removed during ghee-making also mean less surface sticking.
Eggs: Contribute structure and richness. The fat from egg yolks lubricates the gluten network from within, contributing to the supple, yielding texture of the finished bread.
Oil layers: The oil coating between layers is structural. It prevents the thin sheets from bonding to each other under heat, which is what allows them to separate into distinct, flaky layers.
Why This Works
The extended rest (two hours minimum) is the most important step. Glutenin and gliadin proteins in the flour, once hydrated and kneaded, form a tight, elastic gluten network. Extended rest allows this network to become fully relaxed through a process called stress relaxation, making the dough extensible to an extreme degree. Without this, rolling tissue-thin is impossible.
Sugar softens the gluten structure by competing with gluten proteins for water, contributing to the tender texture. Egg protein sets during cooking and helps the layers hold their definition rather than merging.
The strand-forming step is the distinctive technique here. By creating a long strand rather than a simple accordion fold, the dough is layered across more total surface area: more distinct layers, more oil between them, more flakiness in the result.
Low heat during cooking is essential. The multiple layers of this paratha are relatively thin, but they need time for heat to penetrate to the center without the surface burning. Low, patient cooking achieves this; high heat would result in a browned exterior with raw, gummy interior layers.
Substitutions & Variations
- Egg-free: Omit the egg and add an additional 30 ml of milk. The paratha will be slightly less defined in its layers but still good.
- Whole wheat blend: Up to 30% atta can be mixed into the maida without entirely compromising the layer structure. More than this and the layers will become too dense.
- Oil in cooking: Oil can replace ghee on the griddle for a neutral result. Add a teaspoon of ghee at the very end for fragrance if desired.
- Smaller portions: Divide into 20 balls for smaller, single-serving parathas. Adjust cooking time down slightly.
Serving Suggestions
- The classic Malabar pairing is with beef masala or mutton stew.
- With Kerala fish curry. The flakiness holds up to wetter gravies.
- For breakfast, with fried eggs and a chutney.
- With ishtu (lamb or vegetable coconut milk stew) for the mild, gentle version.
- At the Malabar table, paratha is the bread for serious meals and feasts.
Storage & Reheating
Malabar paratha is at its best immediately after pressing open. Leftover cooked parathas can be stacked with parchment between them and refrigerated for up to 1 day. Reheat on a dry tawa over low flame until warmed through. The layers will soften but the flavor remains good. Uncooked coils can be refrigerated overnight after the second rest; bring to room temperature before pressing and cooking.
Cultural Notes
Malabar parotta (മലബാർ പറോട്ട) is the specific regional form of kerala-paratha developed in the Malabar Coast region of northern Kerala (the area around Kozhikode, Kannur, and Kasaragod). The form is associated with the Mappila Muslim community of north Kerala, whose distinctive cooking blends indigenous Kerala technique with Arabic, Yemeni, and Persian influences from a thousand years of Indian Ocean trade between the Malabar Coast and the Arabian Peninsula. The Malabar variant is typically larger, slightly thicker, and made with a slightly different lamination technique than the Tamil Madurai parotta or the broader Kerala parotta.
The Mappila Muslim cooking context shapes the dish's identity. The Mappila community has been continuously present on the Malabar Coast since at least the seventh century CE, when Arab merchants and missionaries established trade and Muslim settlements at Calicut, Cannanore, and Cochin. The cuisine that developed combines Arab influences (the use of dried fruits and nuts in rice dishes, the broader use of wheat flour for breads, certain spice combinations) with indigenous Kerala foundations (coconut, curry leaves, tamarind, the coconut-oil cooking medium). Malabar parotta sits firmly in the wheat-bread half of this lineage and pairs naturally with the Mappila Muslim chicken and mutton curries, the famed Malabar biryani, and the spiced egg curries of the region.
The technical differences from the standard Kerala parotta are subtle but real. Malabar parotta dough is typically softer and wetter, often incorporating egg and a small amount of milk for tenderness. The lamination uses more oil per layer, producing a richer, more croissant-like finished texture. The cooked bread is served at most Mappila Muslim restaurants in Kozhikode (a city sometimes called the "parotta capital of Kerala") and across northern Kerala, often as the bread component of the standard Mappila lunch alongside chicken curry and a vegetable preparation. The dish has spread to Gulf state Indian restaurants and to Mumbai's Mappila-themed restaurants, where it is increasingly recognized as a distinct regional bread within the broader Indian flatbread tradition.
Nutrition Facts
Calories: 672kcal (34%)|Total Carbohydrates: 99.4g (36%)|Protein: 14.5g (29%)|Total Fat: 22.9g (29%)|Saturated Fat: 7.3g (37%)|Cholesterol: 67mg (22%)|Sodium: 32mg (1%)|Dietary Fiber: 3.4g (12%)|Total Sugars: 4.8g
You Might Also Like

Ratings & Comments
Ratings & Comments
Ratings
Share your thoughts on this recipe.
Sign in to rate and comment